Showing posts with label furniture. Show all posts

Friday, July 25, 2014

Reclaimed Bench - From Old Chairs to New Bench


I was buying a dining table one evening, and the couple offered up some chairs for free.  They were all busted up, but soooo pretty.  Pretty and free?  How could I refuse?

Then about three months ago, we were walking through our village and noticed a house which was being refurbished.  Outside was a gigantic pile of wood - from flooring to cabinetry to doors, with a a sign that read "Free!".  We gathered some old flooring planks and door jambs.  I mean, really, how was I supposed to pass up free wood? (Yes, I got a little - read, a lot - of grief from my better half, but still . . . wood in England is about twice the price as in the States.)

Fast forward a little while, and those beautiful, busted chairs and old wooden planks were still sitting in my garage, with no hope in sight for them.
Until . . . I conned my wonderful husband into making something out of them.  It was decided that they would make a perfect bench.

As always, he's way ahead of me building-wise, and I don't have pictures of the plain old chairs and wood. But follow the pics to see a quick guide of the process.  There is a lot more to it than actually detailed below, but that's what happens when the man works while I train for marathons.  :) *Please note the same process is used in the seat as on the bottom shelf*

Look at the legs on those beauties!  A nice piece of wood was attached to the rear to make the bench good and stable.

Measurements were taken for the seat, made from reclaimed flooring, and the bottom shelf, made from reclaimed door jamb material.

Once positioned properly as the seat, the wood was cut at an angle to match the aesthetic of the chairs. 

The wood was then screwed atop the chairs, and wood putty filled the holes.

Then look, it's amazingly finished and painted!  Miracles are at work here, I tell ya!


The piece is painted in Annie Sloan Old White and Old Violet, waxed with a clear wax, and given a nice solid buffing to create the beautiful sheen on the seat.




Thursday, June 19, 2014

Wishy Washy Wash Stand Part Two: The Devil is in the Details

A few days ago, I posted The Wonderful Wishy Washy Wash Stand: Part One, the process of painting a beautiful little piece of furniture I was lucky enough to get my hands on.  Now we come to part two.  And part two is where it gets tricky.  It's all fine and dandy and easy slopping the paint on (okay, I don't slop the paint on), but it's all the little bits afterwards that make the chalk paint process take a while.

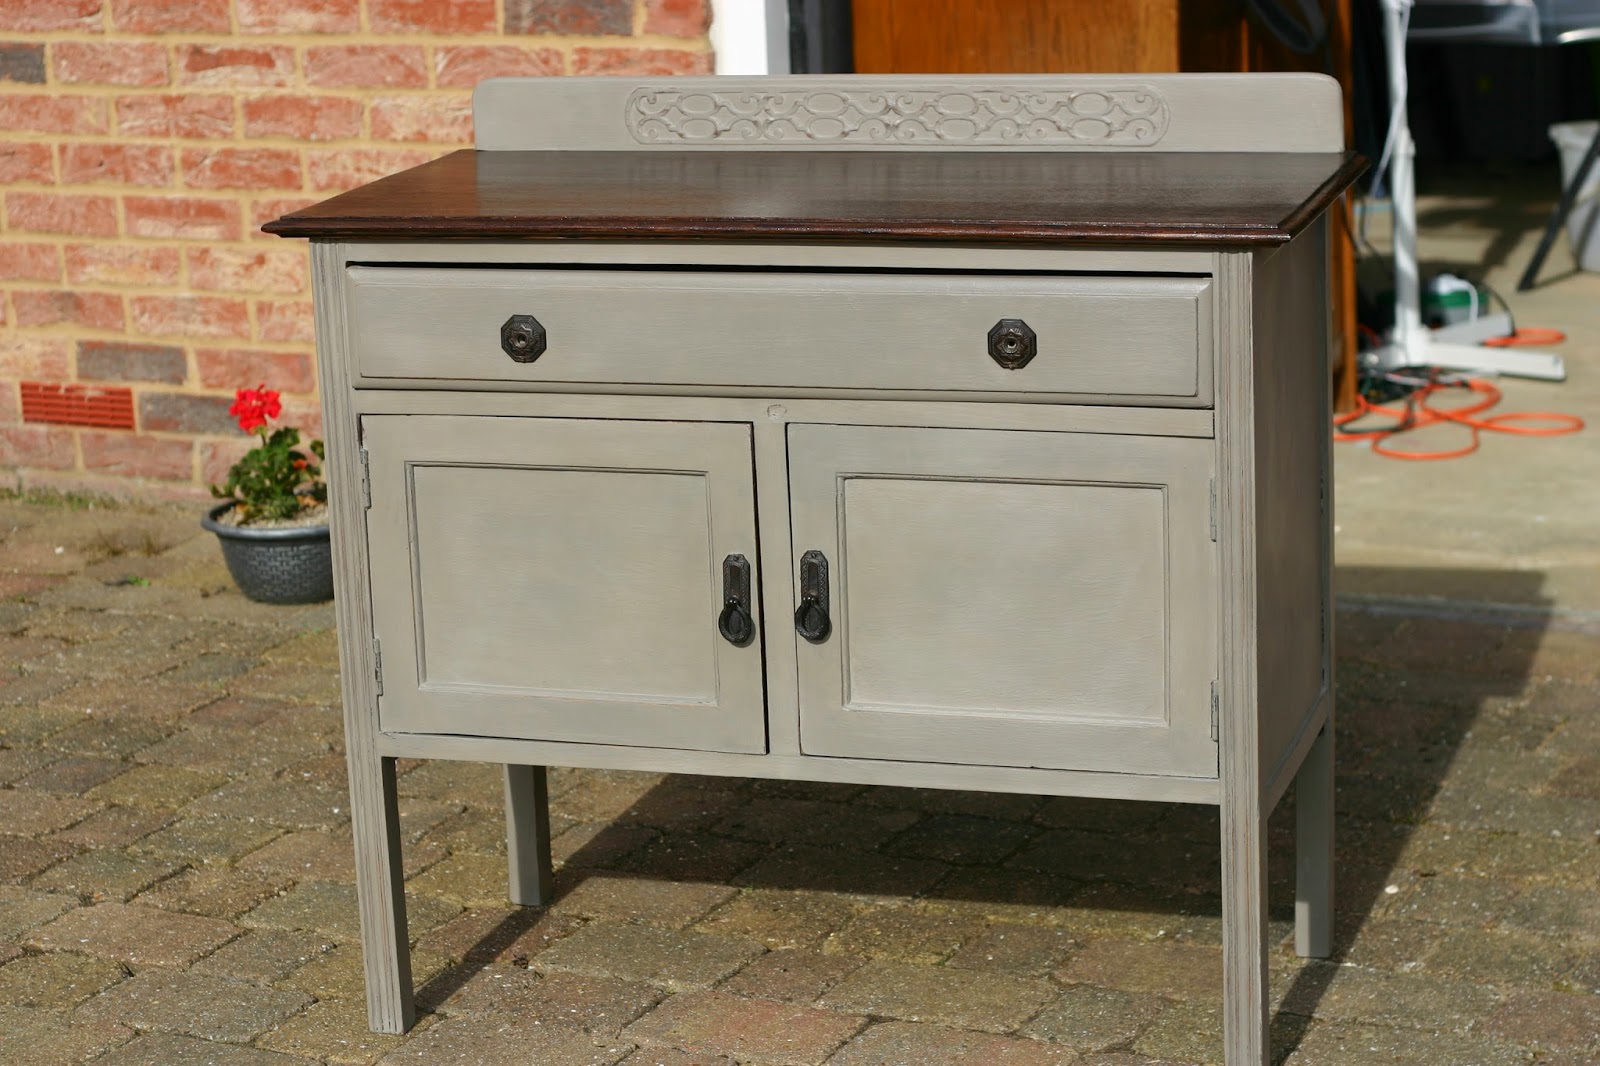
Look at that beautiful stain on the finished product!

One would think two coats of paint, especially Annie Sloan Chalk Paint® (which is renowned for one coat coverage) would be enough.  But then things like this happen.

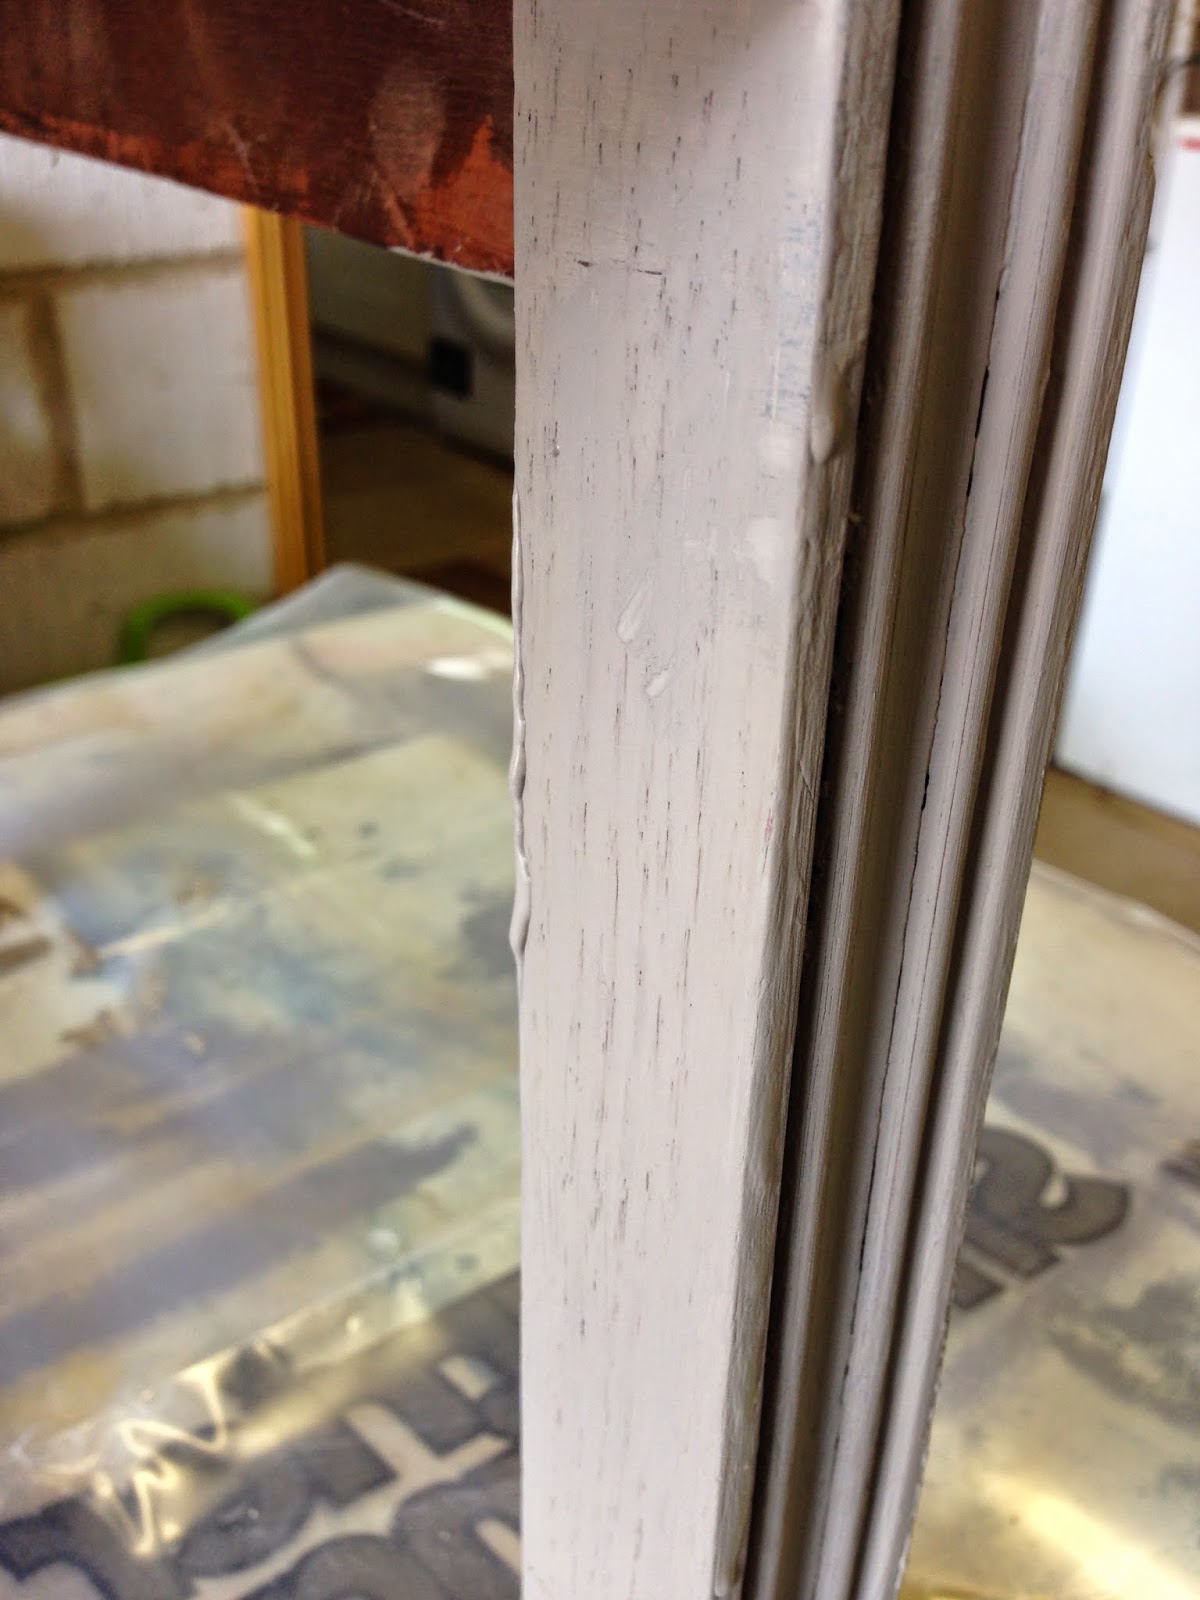
Top Photo: Look closely and see the old woodworm holes on the side which we filled, but alas the little buggers still felt they needed to be seen.
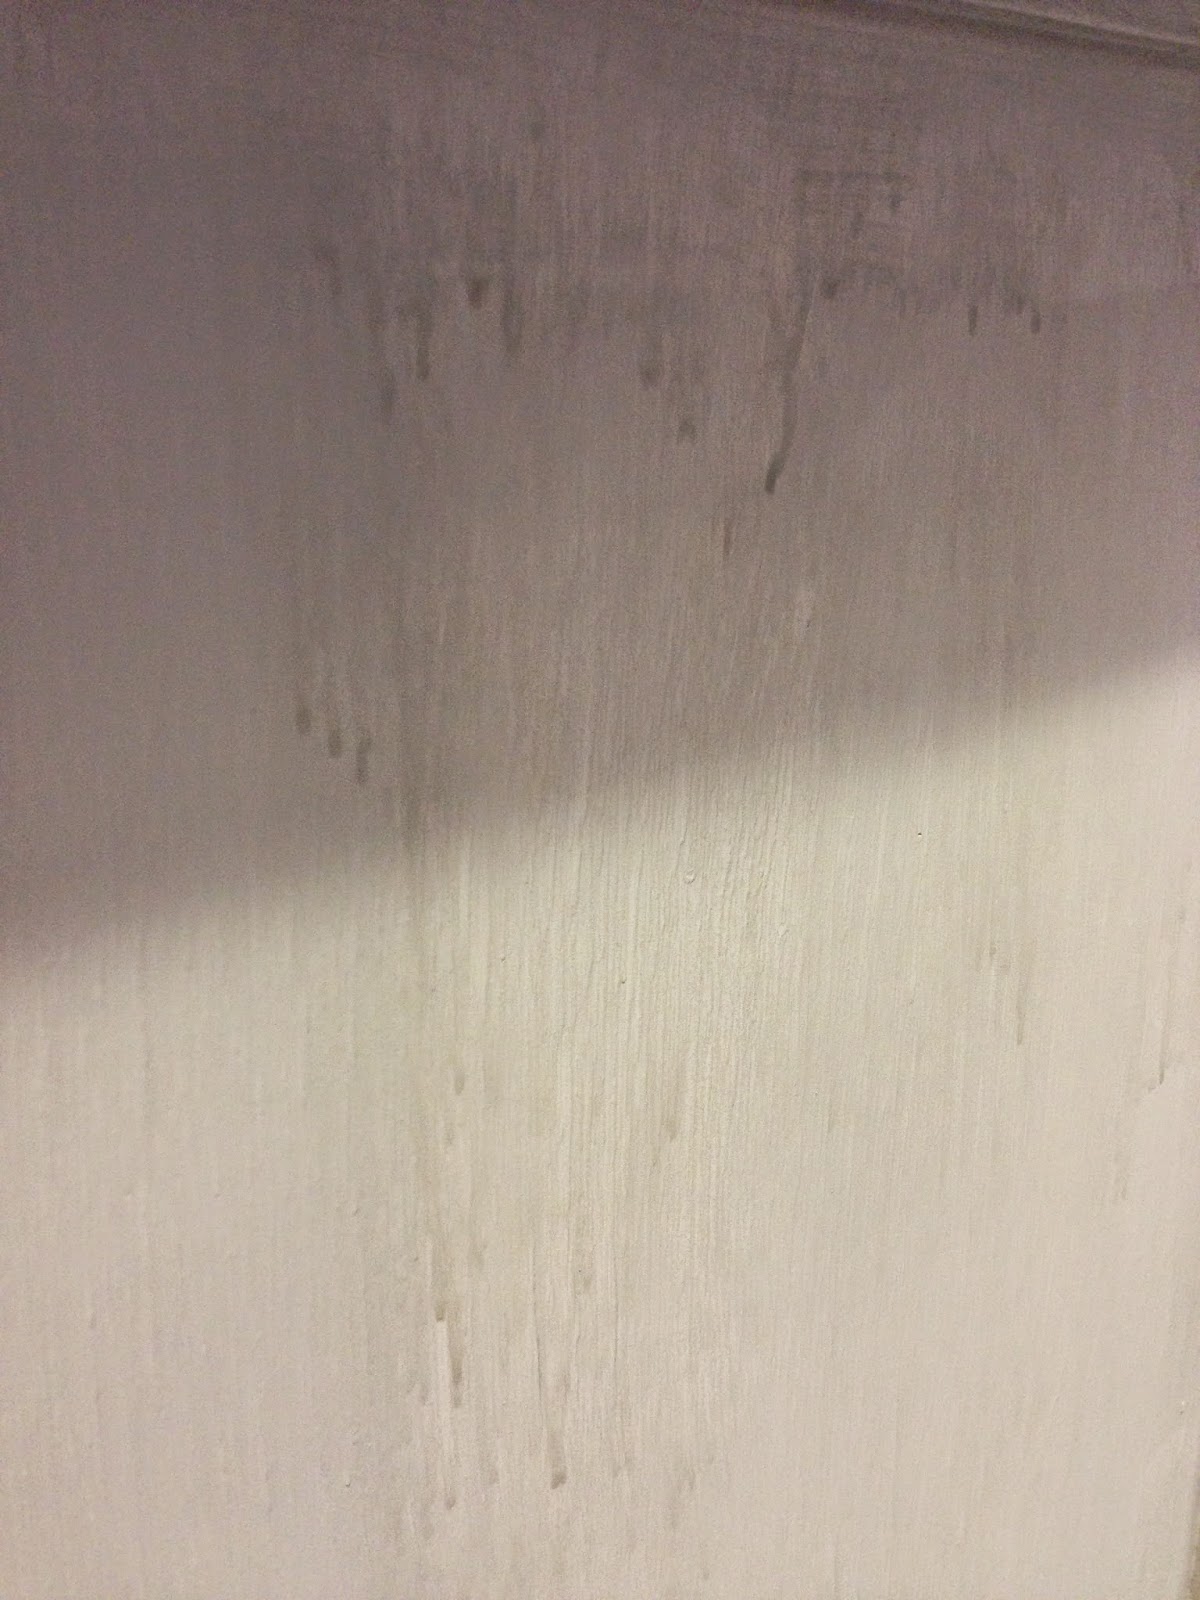
Bottom Photo: My handy little trick of dipping the paintbrush in water can sometimes leave dark, drippy looking spots.


 The watery paint marks were easy enough to remedy:  another coat of water dipped paint, brushed more evenly, and it was good to go.  The wormholes, not so much.  Drastic measures had to be taken.

The side of the table needed to be covered in a multi-purpose primer in order to cover those stubborn holes.  Notice the creative juices.  :)

After giving the side panel a good coating of primer, I gave it another two coats of chalk paint, brushing with a water-dipped brush until it matched the rest of the piece.

Remember all that tape you saw on the wash stand in the first post?  Well, for some reason or another I decided I didn't need to tape the inside of the doors.  Big mistake.  

However, it lets me tell you a cool little secret.  Well, I think it's a secret; I discovered it myself, so we'll just go with that. The secret?  The nature of chalk paint allows you to wipe it off with water!  Even when it's dry!  Granted, it would've been much easier to do had I taped it off, but still . . .

The next step is waxing.  Oh, the waxing.  You know how people say using chalk paint is easy because you don't have to sand the furniture first?  Well, chalk paint sucks just as bad, but on the other end.  The waxing can be tedious, and you constantly have to take a step back to look at any spots which may have been missed - just like sanding. 

But the waxing was done.  I was so into it, I neglected to take any photos of the process.  But I'll give you a little tut in word format:  I happen to have Annie Sloan Soft Wax®, because it's relatively reasonably priced at the shop I buy the paint; it is a clear wax.  You want to use a round brush to apply the wax, in a circular motion.  This will allow the wax to penetrate the paint pores and any cracks and crevices.
But you also want to use the right amount.  Google told me through a variety of sites that just a little is needed.  Through experience I've learned that my little is a lot less than others' little.  So I'm going to be honest with you - you don't want a lot of wax, but you also don't want too little.  What you want is a nice medium coating on the tips of your bristles.  After you've brushed it on, say maybe an area about a square foot, use a soft cloth to wipe any excess off.  Each time you wipe, make sure you are using a clean side of the cloth.  Otherwise, you may end up rubbing the wax from the cloth back onto the furniture, making not-very-nice-looking swirls.
The waxing is done!  Guess what happens now?  Uh-huh, another coat of wax!  You don't have to give it another coat, but if you want good protection, I suggest you do it. Oh, did I mention you should really wait 24 hours before applying the second coat of wax?  Well, you should.

After giving the wash stand its two coats of wax, it's time to get down to the nitty-gritty, looking the piece over thoroughly, fixing any blemishes you come across.

Sometimes tape just isn't enough.  The awkward edges of these beautiful handles made for areas of wood that were left unpainted, while parts of the metal itself did have paint.  The cure for this was a small foam brush to the wood, and a clean razor to the handles - scraped the paint clean off!  Then of course, a nice little wax.  Makes every girl feel nice.  :)

See that light area on the right side, above the handle?  Yeah, I didn't think the paint job was up to par, so I gave another coat, then waxed it (post picture).
The final step is - (oh my gosh I'm so excited!) buffing!  Whoo-hoo!  Who'dve ever thought buffing could be such fun?  You want to take a couple of clean soft cloths and rub in circular motions around the entire piece, making sure you are using clean areas of the cloth.  This process gives your work of art a nice little sheen.  Ask your car-buddy friend; he'll know all about the benefits of a good body polish.

After fussing and prodding over the whole thing, it's time to take a look at this little gem we've been working on.  Of course, that's only after putting the whole thing back together.  Notice the gorgeous hardware and top back piece!


Sunday, June 15, 2014

The Wonderful Wishy-Washy Wash Stand - Paint Process Part One


Kirstie brought me this cute little wash stand to make-over.  Who doesn't love a good make-over?
Isn't it gorgeous?  It needed a little bit of an update though.  Kirstie wanted a taupe color; we decided that Annie Sloan's French Linen was the color to paint.  But . . . there was something different she wanted. Something I haven't tried yet.  She wanted the top a dark color, yet natural if I could do it.
I didn't take a picture of the top piece, but it had a couple of water rings or burn rings, hard to tell which.  I was a little afraid of those.
But I didn't have to be.  My husband came to my rescue, and sanded it down to a perfect natural top.  It didn't even need to be stained, just a little wax finish and it would've been good to go.  We had our direction though, and the hubs got right to it.  I got home form work and he had it all perfectly stained, looking absolutely gorgeous.  If I had a picture to show you, I would, but he's so on top of things, he taped it all up before I had a chance to snaps some photos.


Here it is post stain, pre-paint.
Almost ready for paint.

The next step was to tape around the edges, to prevent superfluous paint.  I taped inside the drawer edges, around the back panel (because this wood is a type of plywood, which takes an excessive amount of paint to cover), and around the knobs and locks, which I might add are extraordinarily gorgeous - they're made as nails, something completely new to me.  After the tape comes the first coat of paint.

First coat of paint
There are inevitably going to be some paint drips.  I want to sand those off before I go any further.


For sanding off the drips, and because it's the first coat of paint, I just use any old rough sandpaper I have laying around.  This was 150 grit, I believe.


Next comes the second coat of paint.  Chalk paint is renowned for not needing a second coat, but I find with older, more used pieces such as this that sometimes the paint doesn't take as well as it should, so a second coat is essential. Also, depending on the furniture and the paint batch, the second coat won't take as easily as the first.  To remedy this, I just barely dip my paintbrush into water before I coat it in paint.  This also keeps the brush stroke to a minimum (which leaves a more polished finish- good if that's what you're after).

First coat

Second coat
As you can see, the color is drastically different from the original piece.  It's also a matte finish.  Don't worry, the end piece will have a nice sheen to it, as well as a number of other things done to it, which will be in the next post.  
My neighbor came by to see what I was up to one day while I was putting the first coat on a telephone table and his remark was, in a completely shocked tone, "So, it's just a matte gray color?". "No.  No good sir, it's not.  Okay, well maybe it is right now, but it won't end up that way.  It will end up as a beautiful work of art."
It's not always easy to imagine a piece of furniture while it's undergoing transformation, because there are so many little bits that go into making it perfect, but don't underestimate what you're doing.  When this is finished, and when you're finished with your piece, they're are going to be masterpieces.


Tuesday, May 6, 2014

Wine Rack from Pallet

My friend has a neighbor who makes things from pallets.  How cool is that?  He made a fantastic wine rack for her.  A HUGE wine rack- he must think she drinks a lot. :)  Gorgeous as it was, she decided she wanted some paint on that baby.  Neutral was the only direction I had, color-wise.  I like the pop that vibrant colors give, but I had to this for her, not me, so the piece is painted in Annie Sloan's Country Grey.  Though I did sneak in some color underneath with Annie Sloan's Old Violet.  :)


Check out the process below.


1. Wine rack upon arrival.  Did a quick sand job, but left it a bit rough.


2. Used a wash of Old Violet on the entire piece.
3. Washed Country Grey over the Old Violet.


4. Close up of the two washes together.

5. The stencil I had envisioned was made differently than I anticipated,
( by a local lady who makes vinyl pieces),
so I needed to repaint the portion which would have the phrase on it.
6. Placed the vinyl on the wine rack.


7.  Covered the entire plank of wood in another wash of Country Grey.
8. Lifted the vinyl.
9. Sanded down the phrase to match the rustic look of the rest of the piece


10. Coated the entire piece in a thin layer of wax.
Enough to give it a finish, yet leave it still unaffected.
  The final piece.  Love the rustic, beachy feel!